Last week, my tutorial walked you through adding a shadow to a clipped template piece! If you missed the first two parts of this tutorial, you can read more HERE.
Today, we are going to add a photo and talk about a few ways to change the look or colors of your photo.
First, we are going to add the photo block on your template. So, you would first have your template open and you'll choose layers from the top menu and open image as layer, you'll choose the first photo block from the png template folder:
Now we are going to repeat that step to pull in a photo and clip it, like we talked about in the first installment of this tutorial:
I also added a shadow, following the steps I showed in installment 2.
Now, let's pretend that you wanted this picture to be brighter or be black and white or sepia or some other look to it. I am going to give you a few steps to do that.
First, open your photo, not as a layer, but through file option up top and open image. This will open it in a separate window and you'll need to save it when you are done editing it and then pull it in as a layer on your layout.
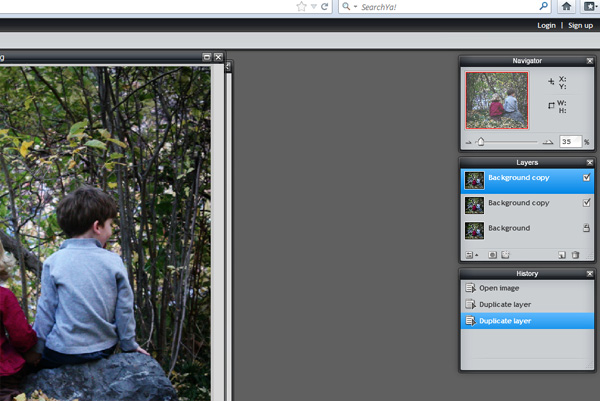
Once, it is open-to brighten the photo, duplicate it:
Here I show it as three in the layer palette on the right side, but it only needs to be 2. I use 3 for photoshop, but 2 works just the same in Pixlr.
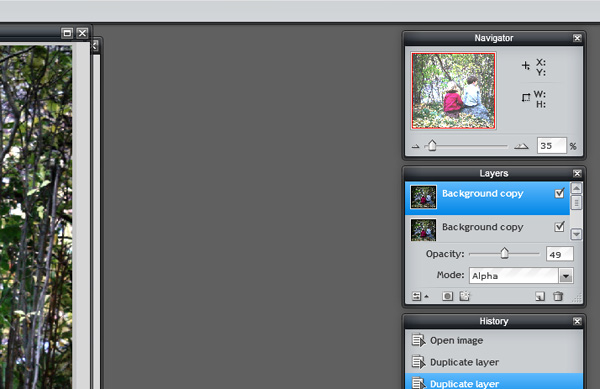
Now highlight the top layer and click on the first little square on the layer palette. This is called "Toggle Layer Settings" and will pull up a little menu as shown on the photo below.
You can change the Mode from normal to Add and then lower the opacity until it is a look you like. This top layer will brighten things so you don't want to leave it at full opacity, but by lowering that bar, you can get a little more pop from the photo below.
Another option is to leave the photo as the only layer and choose from the menu up top. Click on Adjustment and choose the option that says hue/saturation from the drop down menu.
Move the saturation bar all the way to the left, to take the color out. This is a simple way to turn a photo to black and white, but more playing around with settings can give you even better black and white- with more depth to the photo.
One more option is to click on Adjustment to get the pull down menu and choose one of the options toward the bottom! This is what you get when you choose "old photo".
Play around and see all the options you have! This is one of the great things about digital! Now, once you get the look you love (or 10 of them), save each one as a separate file. You don't want to save over your original-in case you will need it again in the future. Once it is saved, then go back to your template and pull in that image as a layer and keep on scrapping!


No comments:
Post a Comment